Thursday, June 27, 2013

Photoshop CC Review - Should Illustrators upgrade? A few tricks to help you decide

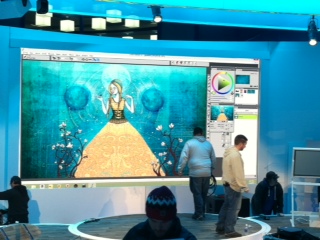
The Adobe User community is in a bit of a tizzy over the new subscription plan for Photoshop CC. If you missed the debate...users must now pay a monthly fee to use Photoshop. You no longer own your software. You own the right to use it when Adobe says you can use it.

There are a lot of cool new features for photographers, but for illustrators, the Brush Panel is a bit of a disappointment. Adobe really has not done much with it in years so I was hoping to be wowed with this upgrade. Here are three new additions to the brush panel:

1. Brush Pose

Brush Pose lets users "achieve stylus-like effects and let you control the angle and position of the brush". (Fig 1)
Fig1
If you already use a stylus then this option will not change your brush. (I am guessing that if you are an illustrator still using a mouse to paint then you must either be A. below the age of 5 or B. have serious masochistic tendencies.)

2. Build Up

In theory, Build Up sounds swell. It "Applies gradual tones to an image, simulating traditional airbrush techniques. The Airbrush option in the Brush panel corresponds to the Airbrush option in the options bar." (Fig 2)

Fig2

Unfortunately, when I gave it a whirl, I saw very little change in how my paint built up. The paint built up slightly darker, but it didn't really change how the paint combined with each different stroke. I tried several different brushes and made sure the "Enable airbrush style build-up effects" was checked in my Menu Bar. Here are a few examples:
A. The Soft Round Brush with no Build-up applied. This is two strokes

B.The Soft Round Brush with Build- up Applied. This is two strokes

Do you see a difference? Perhaps I need to be sipping the Adobe CC Koolaide to see it.

3. Paper Contrast & Brightness inside Brush Texture

The ability to add pattern texture to your brush has been in Photoshop for some time now. In this version, they have stolen a trick from Painter (it's been in Painter for at least the last 4 versions) and now allow users to change the brightness and contrast of the pattern texture. Here is the new menu inside the Brush Panel's Texture option (Fig 3)
Fig 3
In the examples below, I have altered the amount of Brightness and Contrast in my Texture.
 Contrast and Brightness set to 0

Brightness at 100% and Contrast to 0
Brightness at 0 and Contast at 100%
These are some great new features but I would still recommend using Painter to get more organic marks. The reason is simple. In Photoshop, the patten texture is tied to each particular brush that you customize. In Painter, the paper texture is controlled OUTSIDE of the brush. This means that it is more akin to real media. Just like real media, different brushes will react to the same paper texture in different ways. I don't want to have to customize a new brush every time I want it to react differently to my chosen paper/ pattern texture. That is way too much work.

Using Camera Raw 
There are some features that were meant for photographers that I can see coming in handy for illustrators. For example, Camera Raw Filter now allows users to make nondestructive editing without actually having a Raw file. This is probably the biggest reason to upgrade, especially if you use Photoshop mainly to color correct your art. One tool that I really love is the Radial Filter tool inside Camera Raw. Its was designed to allow photographers to create vignettes, but I see it as a magic light correction tool.

The image below is from my next book and it is taken from a chapter on how to paint like Renoir using Corel Painter.

Renoir was a master of light, but in my image, the shadows are too dark on her face to really convey sunlight. I could paint over it or I could use Camera Raw to fix it quickly.

Here are the steps:

1. From the Menu bar select Filter/Camera Raw. This will open up the interface for Camera Raw
2. From the top menu select the option for Radial Filter (Fig 1)
Fig 1


3. Drag a selection around the area that you want to become your vignette. (Fig 2). You can move this vignette area to any spot on your image by selecting and dragging the red circle in the center.
Fig 2: By dragging anywhere on your image with the Radial Filter tool, you can create a vignette.

4. In this case, I wanted the darker areas to be outside my selection area and the lighter area to be on the inside, so I clicked the Inside option. (Fig 3)
Fig 3

5. It is now blowing out my highlights too much so I need to adjust the exposure. I lowered it slightly and also increased the saturation. I then lowered the temperature a tad to remove some of the red. You can see the difference below is very slight, but it is noticeable.
The original image without any color correction. Her face is too dark and too warm.

The image corrected with the Camera Raw Radial FIlter. Her face is now lit with more light.


That is just one new feature. There are others that illustrators will benefit from. I will post more Photoshop CC tutorials later next week. Overall, if you use Photoshop to mostly paint, don't expect much. If you use it to color correct scanned or Corel Painter art, Photoshop CC might be worth the monthly fee.

If you are on CS5 or CS6, do you plan to upgrade? Would love to hear if you have used any of the new features in your work.

Wednesday, April 17, 2013

Leeches, Maggots, and Digital Art....oh my

I will be speaking at the Waltham Public Library tomorrow at 2:00 PM about leeches, maggots, mummy powder, Louisa May Alcott as a civil war nurse, and giving a demo on creating digital art. That is quite a mix! Stop by with your leech loving/computer savvy little one. Ages 7+

Tuesday, January 15, 2013

Back from CES and a few announcements

I am back from the CES show at Vegas and planning to give this blog some much needed love. I hope to have some tutorials up in the coming week but let me know if there is anything in particular that you would like to see? I have finally figured out how to do screencasts too so plan for most of the tutorials to be in video format.

Also have my next book announcement....stay tuned.

If you are a gadget girl like me, CES will leave you positively giddy. So much technology in one place. Here are a few pics:

Here is the Intel booth being set up. We did a quick demo to show how art is influenced my music and dance and vice versa.

Intel had this Salvador Dali like tree made entirely of Ultrabooks (you can guess what I want for Christmas). The metal at the base gave it this melty quality. Very surreal. 

Intel gave away at least a dozen Ultrabooks a day. And you get a laptop....And you get a laptop.... crazy. 


I also did 30 minute and 45 minute demos on painting digitally. I am using Corel Painter and a Sensu brush on an Acer tablet computer here. The system was super fast! (all powered by Intel). I absolutely loved the feel of painting with a real brush. I tried almost every brush on the market before choosing the Sensu. (Review to come later....)

Here is the finished piece.  


I stayed at the Venetian. Tres glamorous. This floor kind of messed with my head. 

And lastly and by far most importantly....I walked by these Jimmy Choos every day. (sigh) a girl can dream. 


Saturday, December 08, 2012

Illustration Friday: Explore

This wasn't how he planned to explore the world. 
This print is part of a series that I am selling at my new Etsy shop

Monday, July 30, 2012

IF: Lonely Girl Tutorial


For anyone who didn't get enough flower patterns in the last week's Digital Painting webinar. Here is a quick written tutorial on how to make a couple of flower brushes.

Fig 1
To follow along, download the flowers file:


Step 1
Draw your pattern. A few things to keep in mind.

  1. Use a 300 dpi file. 
  2. You must draw from left to right. Pulling out a ruler guide can help. Just click on the left hand side of your ruler to drag one out.
  3. You must put your pattern on its own layer so that it has transparency in the background. To create a new layer select Layers/New Layer. Do not draw on the Canvas layer.
  4. You can only use one layer. You can create your illustration on multiple layers, but when you are ready to turn it into a pattern, you must collapse the layers. (Shift click on all the layers and then select Layers/Collapse Layers)
Step 2
Make a selection around your pattern with the Rectangular Selection Tool. Remember that everything you select will be part of that pattern (even the blank space). I like to select some extra space from top to bottom to avoid feathering. (Fig 2)


Step 3
Hit the Capture Pattern button (Fig 3A) in the Pattern Libraries Panel. (Window/Media Library Panels/Patterns)
Fig 3
You will now be asked to name your pattern. Keep the Horizontal and Vertical Shift at 0.

Step 4.
Your new pattern will now appear in your Pattern Libraries Panel. To use this pattern as a brush, select that Pattern Pens Masked brush from the Pattern Pens Brush Category. Paint away with your new brush. Your flowers will now follow the direction of your pen. 


Enjoy! I am sure to have more flower tutorials later...


Wednesday, July 18, 2012

In case you missed it...

The webinar on digital painting is live on youtube. Someone had trouble with the sound but it sounds perfectly clear to me? Let me know if you have trouble hearing it. It might have been an issue that got fixed.

Monday, July 16, 2012

Illustration Friday: Lost

Arachne Lost
This painting depicts the story of Arachne who bragged that she could weave better than the gods. Not one to appreciate such confidence, Athena challenged Arachne to a weaving contest in which the winner got to keep her life. Of course, Arachne lost to the Athena, but the goddess felt pity on her and turned her into the first spider instead of killing her. Arachne's name in greek means "spider" and is from this story that we get the word Arachnophobia. 

Want to learn digital oil painting? I will be painting this picture from start to finish in tomorrow's free Corel Painter webinar. This is the last day to sign up. 
Learn the secrets of how to create paint with weight, depth and texture.